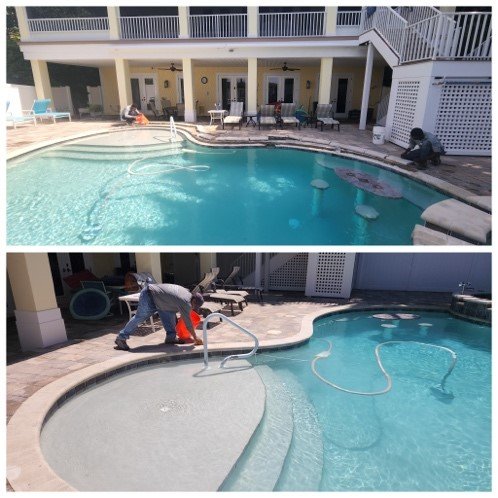
When it comes to installing or repairing coping bullnose (usually a type of tile or stone edge for pools, steps, or walls), the approach can vary slightly depending on whether you’re working with stone, concrete, or ceramic tiles. Here’s a general guide to help you understand the process for both installation and repair:
Installing and Repair Coping Bullnose
Materials You Might Need:
Coping bullnose tiles or stone (preferably pre-shaped)
Mortar or thin-set (appropriate for the material you’re working with)
Tile spacers (if working with tiles)
Trowel (for spreading mortar)
Rubber mallet
Level
Grout (if using tiles)
Safety gloves and goggles
Waterproofing sealant (optional)
1. Prepare the Surface:
Clean the area: Ensure the surface you’re attaching the coping bullnose to is clean, dry, and free from debris.
Level the base: The area where the coping will sit should be level and smooth for proper adhesion. If you’re working with pool coping, make sure the pool’s edge is adequately prepared for the tile or stone.
2. Mix Mortar:
If you’re using thin-set mortar, follow the manufacturer’s instructions. For pool coping, make sure to use a waterproof mortar.
Mix the mortar to a consistency that’s not too runny but spreadable.
3. Lay the Coping Bullnose:
Apply the mortar to the edge of the pool or structure using the flat side of the trowel.
Spread a thin layer and then use the notched side of the trowel to create ridges.
Press the coping bullnose tile or stone into place, ensuring it’s seated evenly.
4. Check Alignment:
As you lay each piece, use a level to check the alignment and adjust as necessary.
Leave small spacers between tiles if you’re using ceramic bullnose tiles. For natural stone, you may not need spacers, but you still want to maintain consistent gaps.
5. Cutting the Coping (if necessary):
If you need to make cuts to fit corners or edges, you can use a wet saw (for stone, ceramic, or porcelain) or a tile cutter for smaller pieces.
For rounded corners, you may also want to trim the bullnose using an angle grinder for a custom fit.
6. Grouting (for tiles):
Apply grout between the tiles if using ceramic or porcelain bullnose.
Use a grout float to press the grout into the spaces between the tiles. Wipe off excess grout with a damp sponge.
Allow the grout to cure for about 24-48 hours.
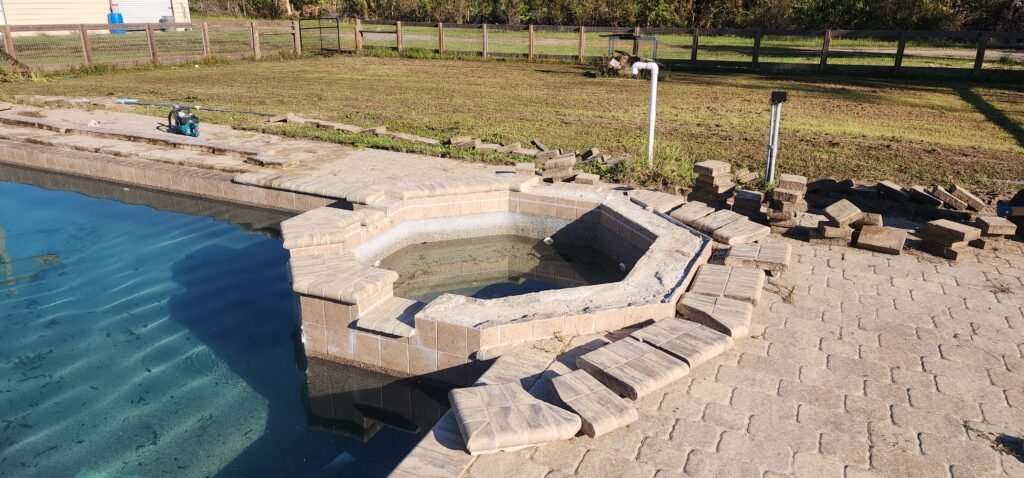
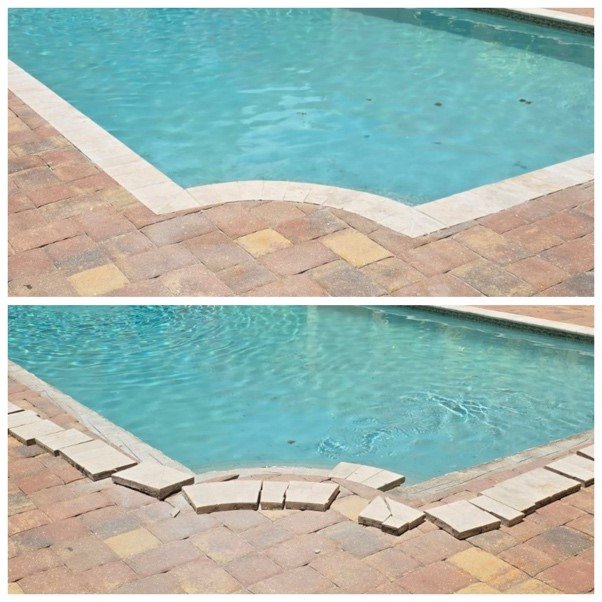
Repairing Coping Bullnose Common Issues:
Cracked or broken coping
Loose coping due to poor adhesion
Grout deterioration
Assess the Damage:
Cracked or Broken Coping: If the coping bullnose is cracked, you may need to replace the damaged piece entirely. If it’s only a small chip or crack, you can sometimes repair it with epoxy or stone adhesive.
Loose Coping: If the coping has become loose, the adhesion may have failed. You’ll need to reapply mortar or thin-set and press the coping back into place.
Grout Deterioration: Grout between the bullnose tiles may wear out over time and need re-grouting.